Showing posts with label electronics. Show all posts

Friday, June 04, 2021

00756, Walnut HID

I'm making a human interface design (imagine a funky keyboard) for a colleague for improved accessability. I've gone off on one and now I have a system of adding buttons to pieces of wood (or anything else I can make holes in) by drilling them, slotting in a plastic cylinder which holds a button and then wire wrapping (rather than soldering) on to an Arduino Pro Micro microcontroller. Then the Pro Micro gets programmed as a keyboard and mouse with encoder buttons as mouse and buttons sending keyvboard shortcuts.

The current version is a small four button, one encoder version:


The challenge now is to get the most functionality out of all the inputs, for example by pressing and holding one of the buttons so that an led lights signalling that all the inputs are now in a different mode.
Thought about putting a tiny screen on it to replace the leds, but it's not so nice visually.

More build pics:


The button and encoder caddies are CNC'd and then cast in silicone, so that multiples can be made in resin:


Other HIDs that got made recently have been more organic:


Wire wrapping:


Tuesday, May 26, 2020

00755, Richard's radio

A while ago I spoke with Richard about how best to convey the order of priorities that exist from his point of view.

We mused about a number of approaches to this problem and I suggested a device that could play back a message conveying the following sentiment:

"I haven't got time"

It's been about two months since we first talked about this and now it's finished.

More for Richard than for the post, here are the instructions:

WARNING: While the unit is intended for use in an office environment, it is technically not safe for work and may offend. Play at reduced volume levels to reduce litigation.

There are two buttons on the top of the unit. The smaller one will turn it on, illuminating the LED on the front panel.
Once the unit is turned on, press the larger button to begin the playback.
Volume can be adjusted using the large volume knob on the front panel. The volume knob has a high sensitivity, and so small movements will increase and reduce volume greatly. Turning clockwise to the limits of the rotation will produce the highest volume.
Switch off after use, using the smaller button. The LED will extinguish.
Battery replacement and access to the SD card are through the panel at the bottom of the unit, which currently require a torx head screwdriver to open.
In case of any problems or malfunctions return to the manufacturer.


Thursday, March 26, 2020

00714, Tiny cosmonaut

Cosmonaut is a much better word than astronaut (IMHFO).

In no particular order, here's the 'making of' images from the nice camera:


00712, the Hand Thing

The Hand Thing is a project I've been obsessing over for a long time.
Editing films and creating motion graphics and animation means working a lot with keyboard shortcuts, you know, cut, paste etc. Most of this work is done with the keyboard and very few time is the keyboard used for typing text (like normal people do).

So this is what they call a Human Interface Device (HID) - something designed to make interactions with a computer easier and/or faster. Here's the end result:


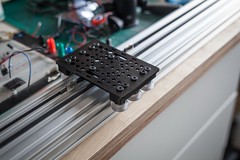
It starts with designing the size and shape of the device with plasticine and placing buttons using ball bearings, so that the buttons fall where the buttons fall where your fingers can easily reach them:


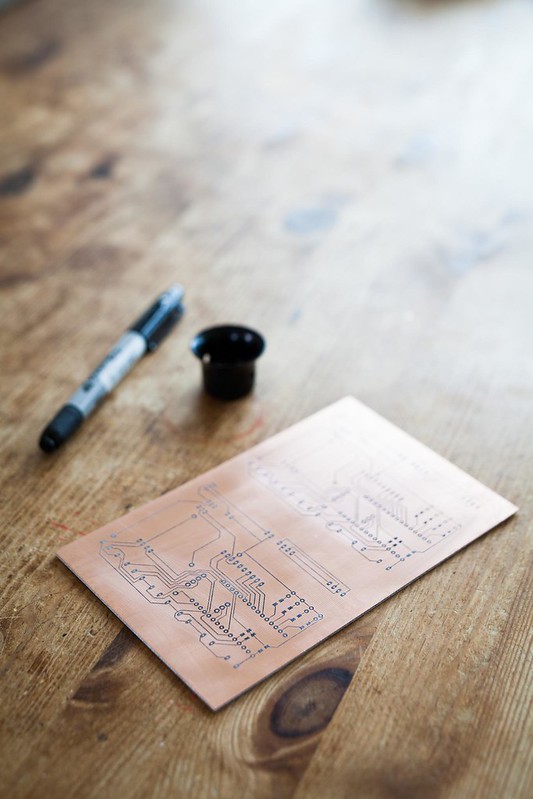
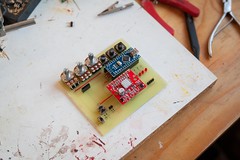
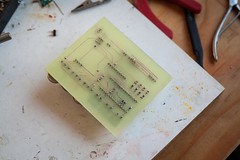
Then it's down to importing the picture into a computer, tracing around the image, making a 3D kinda version of it and cutting the design out of wood using the CNC machine. Once cut, it's on to gluing on buttons and connecting them to a microcontroller (tiny computer), which takes the button presses, converts them into a combination of keyboard commands and sends them down a USB cable to the computer which thinks you're inputting a whole load of keyboard commands:


You could program it to input your name every tine you press a key, or enter passwords and emails automatically. Lots of stuff.

Here's an example fo the code that runs on the microcontroller (called a Teensy LC):


int overlayStatus = 0; // indicates whether to switch to title safe/proportional grid/off

void setup () {
  // initialize the pushbutton pin as an input:
  pinMode(0, INPUT_PULLUP);
  pinMode(1, INPUT_PULLUP);
  pinMode(2, INPUT_PULLUP);
  pinMode(3, INPUT_PULLUP);
  pinMode(4, INPUT_PULLUP);
  pinMode(5, INPUT_PULLUP);
  pinMode(6, INPUT_PULLUP);
  pinMode(7, INPUT_PULLUP);
  pinMode(13, OUTPUT);

  Keyboard.begin();
}

void loop() {

  /*EASY EASE
    if (digitalRead(0) == LOW) {
    Keyboard.press(KEY_F9);
    do {}
    while (digitalRead(0) == LOW);
    delay (10);
    Keyboard.releaseAll();
    }*/


  //CENTRE ANCHOR POINT AND CENTRE IN VIEWER
  if (digitalRead(0) == LOW) {
    Keyboard.press(KEY_LEFT_ALT);
    Keyboard.press(KEY_LEFT_GUI);
    Keyboard.press(KEY_HOME);
    delay (10);
    Keyboard.releaseAll();
    Keyboard.press(KEY_LEFT_GUI);
    Keyboard.press(KEY_HOME);
    do {}
    while (digitalRead(0) == LOW);
    delay (10);
    Keyboard.releaseAll();
  }

  //TIME REVERSE KEYFRAMES
  if (digitalRead(1) == LOW) {
    Keyboard.press(KEY_LEFT_ALT);
    Keyboard.press('y');
    do {}
    while (digitalRead(1) == LOW);
    delay (10);
    Keyboard.releaseAll();
  }

  //SELECT ALL AND SHOW KEYFRAMES/COLLAPSE
  if (digitalRead(2) == LOW) {
    Keyboard.press(KEY_LEFT_GUI);
    Keyboard.press('a');
    Keyboard.releaseAll();
    delay(10);
    Keyboard.press('u');
    do {}
    while (digitalRead(2) == LOW);
    delay (10);
    Keyboard.releaseAll();
  }

  /*SHOW OR HIDE GRAPH EDITOR
    if (digitalRead(3) == LOW) {
    Keyboard.press(KEY_LEFT_SHIFT);
    Keyboard.press('E');
    do {}
    while (digitalRead(3) == LOW);
    delay (10);
    Keyboard.releaseAll();
    }*/

  //PLAY/stop
  if (digitalRead(3) == LOW) {
    Keyboard.press(32);
    do {}
    while (digitalRead(3) == LOW);
    delay (10);
    Keyboard.releaseAll();
  }

  //ADVANCE 1 FRAME
  if (digitalRead(4) == LOW) {
    Keyboard.press(KEY_PAGE_DOWN);
    delay(150);
    Keyboard.releaseAll();
  }

  //RETREAT 1 FRAME
  if (digitalRead(5) == LOW) {
    Keyboard.press(KEY_PAGE_UP);
    delay(150);
    Keyboard.releaseAll();
  }

  //TITLE SAFE/PROPORTIONAL GRID/NO OVERLAY
  if (digitalRead(6) == LOW) {
    if (overlayStatus == 0) {
      Keyboard.press(KEY_LEFT_ALT);
      Keyboard.press(39);
      overlayStatus = 1;
      do {}
      while (digitalRead(6) == LOW);
      delay (10);
      Keyboard.releaseAll();
    }
    else if (overlayStatus == 1) {
      Keyboard.press(39);
      overlayStatus = 2;
      do {}
      while (digitalRead(6) == LOW);
      delay (10);
      Keyboard.releaseAll();
    }
    else if (overlayStatus == 2) {
      Keyboard.press(39);
      overlayStatus = 0;
      do {}
      while (digitalRead(6) == LOW);
      delay (10);
      Keyboard.releaseAll();
    }
  }

  //RESIZE & REFRAME COMP VIEWER TO FIT
  if (digitalRead(7) == LOW) {
    Keyboard.print('.');
    delay(10);
    Keyboard.press(KEY_LEFT_SHIFT);
    Keyboard.press('/');
    do {}
    while (digitalRead(7) == LOW);
    delay (10);
    Keyboard.releaseAll();
  }


}


Sunday, April 24, 2016

00706, Moco turntable

And as well as the slider, there's a new turntable adapter.

C4D design, Shapeways printed in strong and flexible plastic, it's a two-part construction, allowing the turntable to be taken off the motor for storage and transport.

Fits like a glove:


Turntable


Turntable

00705, Sliding around

While I'm waiting for new spinners to arrive, the Moco slider's slid into the main.

Mechanical parts from Openbuilds, driven with Arduino Nano and a Big Easydriver on home-made PCB, et voila:

Moco camera slider


Moco camera slider  Moco camera slider


Moco camera sliderMoco camera slider


Moco camera slider  Moco camera slider


All to film product shots for an upcoming ting and that.