Now all I really need (apart from finishing it) is to find out the safety issues that stop me from seeing LEDs encased in wood on the shelves in shops.
Here's more shots of the build so far:


The last one here is the epoxy sanded flat to the wood. I ended with 1200 grit sandpaper and finished it off with toothpaste, to see if it would make the finish ultra-smooth. It worked ok, but as I'm going to diffuse the ligh anyway, it doesn't matter if the epoxy surfaces aren't perfectly transparent.
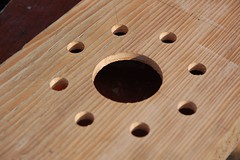
The previous attemts at marrying the wood and epoxy together were getting better. This was the last attempt at a small lamp, which has got as far as all the wooden bits cut out and the epoxy set on the wooden face:


The only bummer here is that I painted epoxy on the acetate sheet, placed the wooden face on top to create a seal and preempt the "bleed" of epoxy onto the outside of the face plate. The idea was that if the whole face was covered in epoxy it would stick to the acetate and create a seal, stopping the epoxy from leaking out onto the face and causing a buging bit of plastic to stick out - it's a real pain to sand back. The result, however, was that I ended up with a plastic coated bit of wood. While this was smooth as you like, it just looks too "plasticky" and the idea was to seamlessly blend the wood and the epoxy so that one ran into the other - something I've now sorted out.
No comments:
Post a Comment